August 31, 2018
I use a variety of CLI software for day to day development. One I use heavily is Homebrew. I use it to install various libraries and applications on my Mac. Among benefits, it provides an easy way to install and manage software, without the need of administrative access. That’s important to me.
However, two caveats of Homebrew are that 1) it does not automatically remove old installation files (which can result in significant disk space over time/usage) and 2) the Homebrew software database is not automatically updated. To achieve both of these, you have to run commands periodically.
I’m lazy and would prefer if these commands were run on a regular basis on my Mac. So I turned to cron for help.
What is cron?
cron is a time-based job scheduler found in most Unix-like computer operating systems, like macOS. cron is driven by a crontab (cron table) file, a configuration file that specifies commands to run periodically on a given schedule.
Creating a crontab file
To see if you have an existing crontab file, run the following at the command-line:
$ crontab -l
To create a new crontab file or edit your existing, simply run:
$ crontab -e
This will launch your default editor (typically VI) and open the crontab file to edit it. Here’s an example job you can save to the crontab file.
* * * * * echo 'Hello, world!'
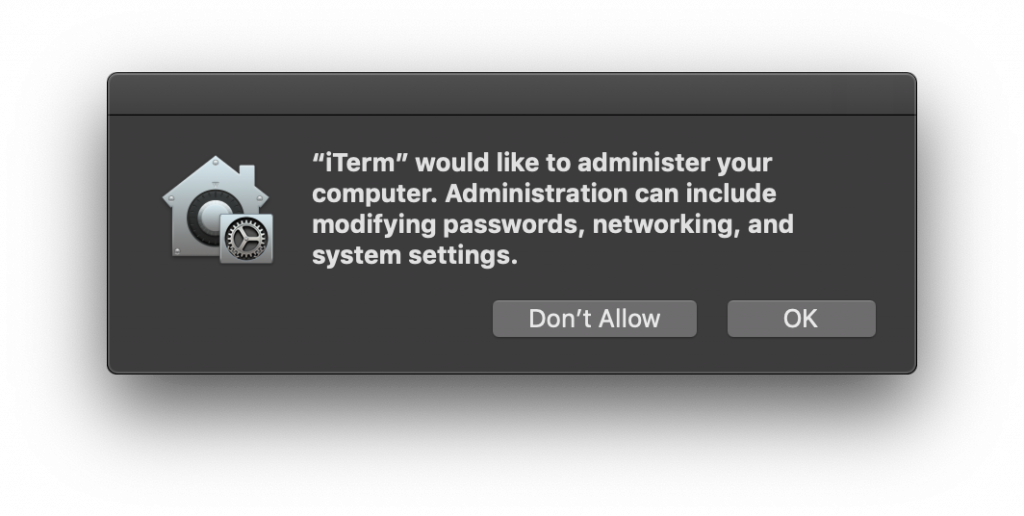
Note: On macOS Mojave (10.14), and maybe older versions too, saving a crontab file and attempting to install it will trigger a security dialog like the following. You’ll need to hit OK to allow the scheduling to occur.

Crontab usage
The syntax of a crontab file has five fields for specifying time, date, & day followed by the command to be run at that interval.
* * * * * command to be executed
- - - - -
| | | | |
| | | | +----- day of week (0 - 6) (where 0 represents Sunday and 6 represents Saturday)
| | | +------- month (1 - 12)
| | +--------- day of month (1 - 31)
| +----------- hour (0 - 23)
+------------- min (0 - 59)
Use an * (asterisk) for one of the five time, date, or day fields to mean every value should be applied (which would be every value in the ranges I provided above in parentheses). Use a , (comma) to delimit multiple values. And use a – (hyphen) to denote a range of values.
Here are some examples:
0 8 * * 1 echo 'every Monday at 8AM'
0 8 * * 1,5 echo 'every Monday and Friday at 8AM'
0 8 * * 1-5 echo 'every weekday (Mon - Fri) at 8AM'
On a Mac, instead of the first five fields, one of eight special strings can be used, which is very useful.
@reboot     Run once, at startup.
@yearly     Run once a year, "0 0 1 1 *".
@annually   (sames as @yearly)
@monthly    Run once a month, "0 0 1 * *".
@weekly     Run once a week, "0 0 * * 0".
@daily      Run once a day, "0 0 * * *".
@midnight   (same as @daily)
@hourly     Run once an hour, "0 * * * *".
Setting environment variables
cron executes jobs under its own environment variables and PATH, which defaults to:
PATH=/usr/bin:/bin
This means that if you try to create a job that will run commands that are not in cron’s PATH (e.g., Homebrew commands), cron will complain that it can’t find the command and fail to run. To get around this, you can specify the PATH in the crontab file before the command.
PATH=/usr/local/bin:/usr/bin:/bin
* * * * * brew update
Running commands from a separate file
In my case, I wanted to run a few Homebrew commands on a regularly basis, so I placed all my commands in a separate shell script and added the path to my shell script. My crontab file looks something like this:
@daily /path/to/shell/commands.sh
My shell script file looks something like this:
#!/bin/sh
PATH=/usr/local/bin:/usr/bin:/bin
brew cleanup
brew cask cleanup
brew update
To allow cron to run a shell script, make sure you’ve modified the permissions to make it executable:
chmod u+x /path/to/shell/commands.sh
Hey, you’ve got mail
Cron is a daemon, so you won’t be able to see a it run in the terminal/command-line. So how do you know if a cron job has been run successfully?
Well, it turns out that cron sends out an email each time the scheduler runs. You can access these messages through the mail command:
$ mail
This lists all the messages you’ve received. If you prefer to have them emailed to an actual email account, you can add the following to your crontab file:
MAILTO="yoursnazzyemailaddress@somedomain.com"
— Onyx